Your first Django project!
Part of this chapter is based on tutorials by Geek Girls Carrots (http://django.carrots.pl/).
Parts of this chapter are based on the django-marcador tutorial licensed under Creative Commons Attribution-ShareAlike 4.0 International License. The django-marcador tutorial is copyrighted by Markus Zapke-Gründemann et al.
We're going to create a simple blog!
The first step is to start a new Django project. Basically, this means that we'll run some scripts provided by Django that will create the skeleton of a Django project for us. This is just a bunch of directories and files that we will use later.
The names of some files and directories are very important for Django. You should not rename the files that we are about to create. Moving them to a different place is also not a good idea. Django needs to maintain a certain structure to be able to find important things.
Remember to run everything in the virtualenv. If you don't see a prefix
(myvenv)in your console you need to activate your virtualenv. We explained how to do that in the Django installation chapter in the Working with virtualenv part. Typingmyvenv\Scripts\activateon Windows orsource myvenv/bin/activateon Mac OS / Linux will do this for you.
In your MacOS or Linux console you should run the following command; don't forget to add the period (or dot) . at the end:
(myvenv) ~/djangogirls$ django-admin startproject mysite .
On Windows; don't forget to add the period (or dot) . at the end:
(myvenv) C:\Users\Name\djangogirls> django-admin startproject mysite .
The period
.is crucial because it tells the script to install Django in your current directory (for which the period.is a short-hand reference)Note When typing the commands above, remember that you only type the part which starts
django-adminordjango-admin.py. The(myvenv) ~/djangogirls$and(myvenv) C:\Users\Name\djangogirls>parts shown here are just examples of the prompt that will be inviting your input on your command line.
django-admin.py is a script that will create the directories and files for you. You should now have a directory structure which looks like this:
djangogirls
├───manage.py
└───mysite
        settings.py
        urls.py
        wsgi.py
        __init__.py
manage.py is a script that helps with management of the site. With it we will be able to start a web server on our computer without installing anything else, amongst other things.
The settings.py file contains the configuration of your website.
Remember when we talked about a mail carrier checking where to deliver a letter? urls.py file contains a list of patterns used by urlresolver.
Let's ignore the other files for now as we won't change them. The only thing to remember is not to delete them by accident!
Changing settings
Let's make some changes in mysite/settings.py. Open the file using the code editor you installed earlier.
It would be nice to have the correct time on our website. Go to the wikipedia timezones list and copy your relevant time zone (TZ). (eg. Europe/Berlin )
In settings.py, find the line that contains TIME_ZONE and modify it to choose your own timezone:
TIME_ZONE = 'Europe/Berlin'
Modifying "Europe/Berlin" as appropriate
We'll also need to add a path for static files (we'll find out all about static files and CSS later in the tutorial). Go down to the end of the file, and just underneath the STATIC_URL entry, add a new one called STATIC_ROOT:
STATIC_URL = '/static/'
STATIC_ROOT = os.path.join(BASE_DIR, 'static')
Setup a database
There's a lot of different database software that can store data for your site. We'll use the default one, sqlite3.
This is already set up in this part of your mysite/settings.py file:
DATABASES = {
    'default': {
        'ENGINE': 'django.db.backends.sqlite3',
        'NAME': os.path.join(BASE_DIR, 'db.sqlite3'),
    }
}
To create a database for our blog, let's run the following in the console: python manage.py migrate (we need to be in the djangogirls directory that contains the manage.py file). If that goes well, you should see something like this:
(myvenv) ~/djangogirls$ python manage.py migrate
Operations to perform:
  Synchronize unmigrated apps: messages, staticfiles
  Apply all migrations: contenttypes, sessions, admin, auth
Synchronizing apps without migrations:
   Creating tables...
      Running deferred SQL...
   Installing custom SQL...
Running migrations:
  Rendering model states... DONE
  Applying contenttypes.0001_initial... OK
  Applying auth.0001_initial... OK
  Applying admin.0001_initial... OK
  Applying contenttypes.0002_remove_content_type_name... OK
  Applying auth.0002_alter_permission_name_max_length... OK
  Applying auth.0003_alter_user_email_max_length... OK
  Applying auth.0004_alter_user_username_opts... OK
  Applying auth.0005_alter_user_last_login_null... OK
  Applying auth.0006_require_contenttypes_0002... OK
  Applying sessions.0001_initial... OK
And we're done! Time to start the web server and see if our website is working!
You need to be in the directory that contains the manage.py file (the djangogirls directory). In the console, we can start the web server by running python manage.py runserver:
(myvenv) ~/djangogirls$ python manage.py runserver
If you are on Windows and this fails with UnicodeDecodeError, use this command instead:
(myvenv) ~/djangogirls$ python manage.py runserver 0:8000
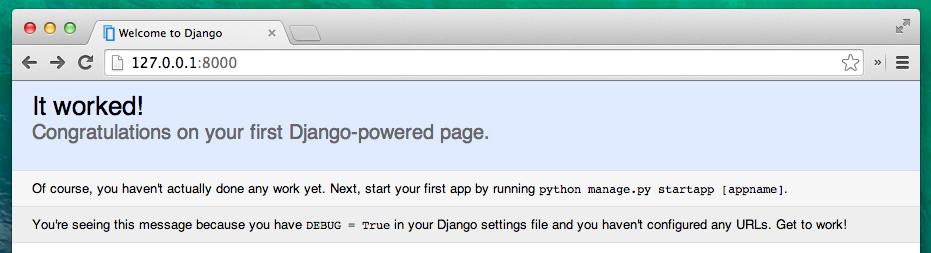
Now all you need to do is check that your website is running. Open your browser (Firefox, Chrome, Safari, Internet Explorer or whatever you use) and enter the address:
http://127.0.0.1:8000/
The web server will take over your command prompt until you stop it. To type more commands whilst it is running open a new terminal window and activate your virtualenv. To stop the web server, switch back to the window in which it's running and pressing CTRL+C - Control and C buttons together (on Windows, you might have to press Ctrl+Break).
Congratulations! You've just created your first website and run it using a web server! Isn't that awesome?
Ready for the next step? It's time to create some content!